Applying non-woven wallpaper has never been easier.
After you have completed the preparation, the wall is ready for wallpaper application. Make sure you have everything you need close at hand. Now you can get to work
Applying wallpaper will create fewer problems for you compared to painting the room. You can call a professional or you can install the wallpaper yourself! You just need skill, time and attention to detail. Read on to find out the steps to follow when you decide that wallpaper is the best choice for decorating your walls!
Tip! Before application, it is recommended to cut all the strips to the appropriate sizes, leaving a few centimeters extra in case you need to make adjustments. Glue them in the same order as they were cut from the roll and fit them carefully on the wall.
WHY DO YOU NEED WALLPAPER APPLICATION?
Once you’ve organized your space and are ready for action, the next step is to prepare the tools you’ll need!
- Wallpaper: Make sure you purchase the correct number of rolls. You can even buy a few meters or even a roll in addition to what you calculated, so you don’t have any surprises, and then you can use the roll to decorate a closet or some shelves. You will find the information about the dimensions of the rolls for each wallpaper model, depending on the model and the distributor, you just have to make the correct calculations for the surface you want to apply the wallpaper or photo wallpaper to.
- Adhesive: In most cases you will find the adhesive recommended for the respective wallpaper at the same distributor. You just need to take into account the type of wallpaper and the type of suitable adhesive and prepare it according to the instructions on the label.
- Brush/Stencil/Grilling: To apply the adhesive paste to the wall, you will need a large brush or a stencil with a grating. A smaller paintbrush is also useful for applying the adhesive paste near the corners of the wall, especially if you are wallpapering only an accent wall.
- Ruler and pencil: The ruler is necessary to carefully measure the surface on which you mount the wallpaper and the length of the wallpaper strips.
- Cutter and Scissors: You will need the cutter to cut off the excess wallpaper and the scissors to cut the measured strips of wallpaper before application. Each roll has clear instructions, which will help you not to make mistakes, even if you have no experience.
- Plastic spatula/putty knife: You will use the putty knife to smooth the surface of the applied wallpaper to break any air bubbles that form after gluing.
- Sponge: A special wallpaper sponge would be ideal, but you can also use another soft cellulose sponge or even a clean cloth to level and water the wallpaper.< /li>
- Bubble level: Don’t look away, use a bubble level (boloboc) to position the wallpaper correctly.
STEP BY STEP PLAN
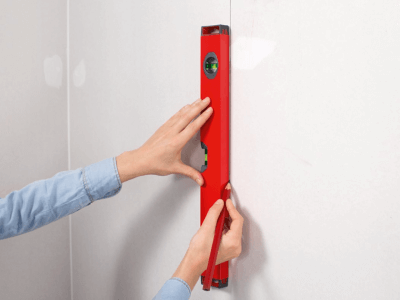
STEP 1: Start with the wall that has the best source of natural light. It is important that the first strip is applied correctly, as this will be the standard. Draw a vertical, guide line with a pencil using the plumb line or a spirit level.
Hang the lead wire about 50 cm from a corner, door or window. The walls with windows will be wallpapered last because you can use the remaining strips.
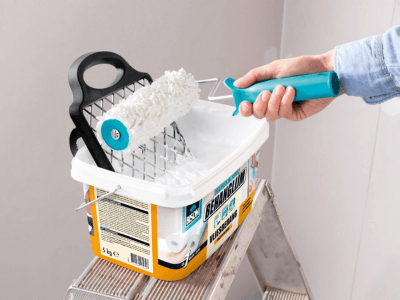
STEP 2: Put in the bucket with adhesive a grate to rest on the edge of the bucket. Move the roller slowly across the grid from top to bottom so that the adhesive penetrates the roll evenly and to remove excess adhesive.
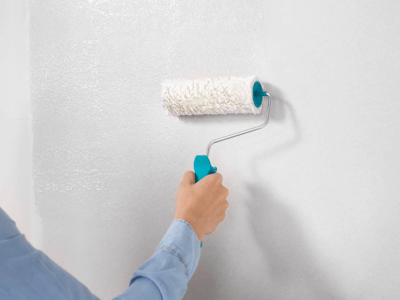
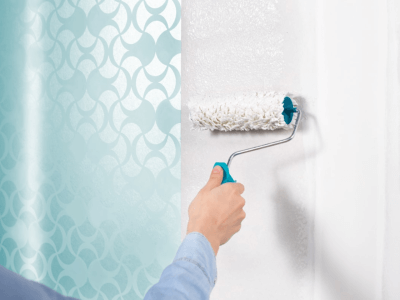
STEP 3: Apply the adhesive evenly directly to the wall using the roller. The area you apply the adhesive to should be slightly larger than the strip of wallpaper you are going to stick.
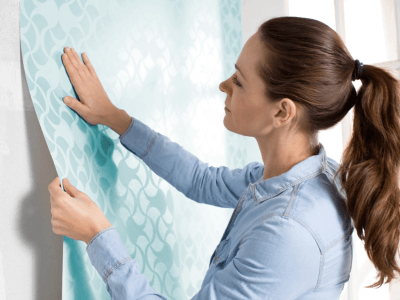
STEP 4: Stick the piece of wallpaper following the vertical line drawn with the pencil. Leave a surplus of approx. 3 cm of wallpaper that you will remove later.
STEP 5: Carefully smooth the wallpaper strips with a putty knife to remove air bubbles or excess adhesive under the wallpaper. Start from top to bottom and from the middle to the side edges. Make sure the strips of wallpaper meet perfectly at the edges without overlapping.
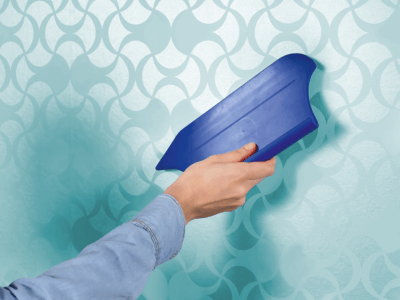
STEP 6: For the corners, choose a strip that runs along both sides of the walls. Once you have glued the strip to one side, gently and carefully press the wallpaper into the corner with the adhesive. Once the wallpaper has set, continue on the other wall.
With the help of the spatula, carefully press the wallpaper at the joint between the walls, between the wall and the ceiling, also at the joint between the wall and the window or door frame.
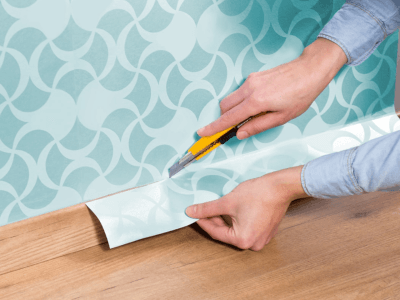
STEP 7: Cut the excess wallpaper from both the top and bottom of the wall using a cutter. Make sure its blade is sharp to avoid tearing the wallpaper. Hold the blade at an angle of approximately 30 degrees to ensure a clean and straight cut.
Tip! Pay attention to where the switch/socket is and poke a few holes with scissors to mark the area. While leveling the wallpaper, press to the edges of the outlet/switch and when you feel it stick, cut using the cutter very close to the edge. Press with the spatula, so that the wallpaper sticks completely.
STEP 8: Lay the next strip of wallpaper in the same way and make sure it fits perfectly, without overlaps or gaps. Continue on the entire surface of the walls.
Tip! Be careful when merging the printed pattern on the wallpaper. Check the product label and see how far the pattern repeats. It thus calculates the required amount of wallpaper, which may differ from the surface of the walls to be covered.
WHAT SHOULD I REMEMBER?
A few things to keep in mind before you buy the wallpaper, before you apply it and during installation:
- Measure the surface you want to apply the wallpaper to several times, until you are 100% sure how much wallpaper you need.
- Do the math and then buy more wallpaper than you’ve decided you need. It is important to think about the losses that result during installation, due to the repetitiveness of the pattern on the chosen wallpaper. Usually you will have a loss of approx. 15%.
- Make sure you purchase the right amount of adhesive for the type of wallpaper you choose
- Follow the preparation instructions on the adhesive label, the drying time after installation and the instructions of the type of wallpaper used.
- Clean the walls very well beforehand and do not apply the wallpaper over imperfections.
- Do not leave space between the wallpaper strips once applied and do not smear the edges of the wallpaper strips with adhesive.
Installing wallpaper can be a very easy job if you follow the essential steps carefully. When you don’t feel safe applying it yourself, you can call a professional, but if you miss doing something for your home, installing wallpaper will give you long-term satisfaction. A newly redecorated home will change your mood and maybe even your lifestyle, and you can even add a new skill to your personal list!


